Drawings For Crafting 4x8 Gable Shed - How to Select the Right Shed Building Blueprints
Having a sturdy backyard shed floor is crucial to maximizing life of your shed. Designing a slant roof outbuilding is extremely easy for woodworking enthusiasts. Use a powder actuated nailer to drive a few nails through blocks into the concrete. Make sure you thoroughly understand the instructions and actually have ability and tools to do the job. They would help you can craft a storage outbuilding which will last for many decades. The triangular part of gable wall is built after the rafters are installed. The outside rafters have to be placed such that birdsmouth (https://shedconstructionplans.com/8x12-clerestory-shed-plans-blueprints) is on a plane with the highest plate of the wall.
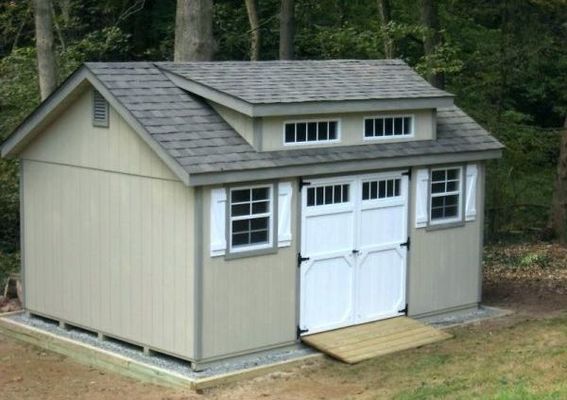
The astragal is the molding that covers gap between a pair of doors when closed. Adjustable screw jacks are used to support the timber sub-frame. Make sure to straighten the wall plates and square the wall by measuring diagonally before you nail on the siding. Buying and assembling a prefabricated storage utility outbuilding is an option. Tack fascia into place and use clamps to hold bottom sheet of sheathing in place after aligning it. The screed will help reduce the high spots in your gravel by moving the excess gravel into the low spots. A pair of trenches filled with gravel and topped with treated 6x6s is adequate in areas with well-drained soil.
Take care not to nail through overlap of two pieces. Measure (find out more) and cut 2×4s and install on side wall between rafters. Measure and craft your top and bottom plates. You would probably get many ideas about the color, shape and design for you shed. This avoids need for cutting firring timbers or lots of small fiddly packing pieces. After assembling floor frame, you need to attach 4×4 skids. Place a two feet wide sheet of OSB on top of the frame and screw it into place from top. You'll need at least two clamps to secure planks to the tabletop when cutting and building.
Processing video...
Basic construction consists of setting poles in holes in the ground and anchoring poles in place with concrete. Use two types of fasteners to secure stringers to ledger. The steeper pitch of roof, harder it is to put shingles on. The top chord of the roof truss projects past wall plate by desired amount. Before installing the ceiling joists to the jacks, sight along the hip rafter to ensure it is straight. Make a second plumb cut at line length measurement on rafter. Some online sources offer different blueprints for storage and backyard sheds. Cutting rafter tails from above causes kerf to open naturally and lets waste fall away easily.
Some popular choices include building it close to house, which makes running power and water lines easy, or tucking it to side or back of your property so that it's less obtrusive. Depending on design, you can create brackets from 4x4s or by laminating 2-by boards. Snap lines for short sides, extending them all way out to post locations. After cutting the posts to length, craft ends of each 4x4 at a 45-degree angle. Avoid placing fasteners in tongue-and-groove or shiplap joints. Mark level craft square to the plumb cut and make cuts using a circular saw. Drill a hole in each corner and use a jigsaw to cut hole.
Treating your storage shed is essential if you want it to last a long time. Calculate number of plywood boards you need for the project by measuring the length and height of each wall and multiplying measurements together. While this provides a durable construction, the walls and roof are very thin and may warp out of shape over time. The lower ends of the rafters could run long and vary in length. Tired of stumbling over lawn tools and equipment in your shed? The biggest advantage of building a storage outbuilding from scratch rather than purchasing one is that you would save a ton of money.
This includes horizontal battens and vertical pieces if using picture-frame style construction. Gather tools like saw and wrench so you don’t have to go looking for them later. Bear in mind that once you start building shed, there will be no turning back. Measure lengths between opposite angles to ensure area is square and not slanted.